
Monorepos are a great tool to use when you have code to share across many different repositories. For example, if you have a web, and native app which can share code, creating a ‘common’ or ‘shared’ repository can keep your code DRY. Otherwise you’re going to be abusing copy and paste in a way Larry Tesler won’t be proud of.
Google, Facebook, Microsoft, and all other tech giants use monorepos to organise, and run their systems. Goliath sized companies aren’t the only ones who do, or stand to gain from the technology.
Any software, or platform which has many distinct parts can be split up in this way to separate concerns, and maintain DRY, focused code. Some of the most popular React libraries are split up this way, see ‘react-router’ as an example.
There are many tools which can handle a monorepo setup, all with their own distinct advantages. Yarn workspaces, Lerna, Bazel are examples of some of the most well-known tools for the job.
But how do you set up a monorepo? And what does it look like with a React web, and native app?
Want to skip ahead and see the finished result? Check the repo out here.
What you will need
- node
- yarn
- react/react-native environment setup
I’m using node v14, and yarn v1.22. You can use different versions, but your results may vary somewhat.
Now let’s create a React, React-native monorepo with yarn workspaces!
To begin
Create the directory for our monorepo. I’m going to name mine ‘react-monorepo-example’, but name yours whatever makes sense.
Inside our new directory, let’s create our package.json, to do so
yarn init
Update the newly created package.json with the following properties
"workspaces": {
    "packages": [
        "packages/**"
    ]
}
The “workspaces” key turns on the yarn workspaces feature, while the “packages” key defines which directories are considered packages by the root directory.
So in our example here, once we create the web, shared, and app folders within the packages directory all of those will be considered packages by the root.
So lets create each of our packages, first lets create the packages directory
mkdir packages && cd packages
Now let’s create each of our packages
Web
npx create-react-app web --template typescript
App
npx react-native init app --template react-native-template-typescript
Shared
npx create-react-app shared --template typescript
(The shared directory uses React to keep logic similar, and take advantage of key tools such as the React lifecycle for business logic)
Note, you don’t have to use typescript for a monorepo to work, or even to complete this tutorial. I just prefer using typescript, and that’s why I’ve included it here.
Setting up hoisting
Yarn workspaces has a great feature called hoisting - in brief, if you use the same library across multiple packages (example being React), yarn workspaces will ‘hoist’ those dependencies to the root ‘node_modules’ directory. All sub-projects which use that same dependency will access the ‘hoisted’ version at the root directory.
Since we’re using React across each of these projects, using the same hoisted version will save us from many issues which can arise if you choose to exclude it. Personally I spent a nightmarish couple days trying to stop seeing a red screen saying ‘Multiple instances of React found’.
Luckily for us, only the React Native app requires some hoisted libraries to be ignored. If you’re also using the ‘react-native-template-typescript’ then you can follow exactly what i’ve ignored here
  "workspaces": {
    "nohoist": [
      "**/react-native",
      "**/react-native/**",
      "jetifier",
      "react-native-safe-area-context",
      "react-native-screens",
      "@react-native-community/**",
      "@react-navigation/**"
    ]
  },
The app, and shared directory don’t require any ‘nohoist’ settings to be configured.
Name change (optional)
While you’ve got each ‘package.json’ open, you have the option to rename what the package will be accessed as by other packages. For example we currently have a ‘shared’ package, which will be accessed by other packages (in future) by accessing “shared/{path}“.
To make it more distinct and obvious that it’s a part of our monorepo setup we could rename it within the ‘package.json’. A common pattern is to rename a package by inserting an @ sign, along with the monorepo project name. So for example our “shared” could become “@react-monorepo-example/shared” instead. Hopefully your project isn’t as much of a mouthful.
Although this is optional, I’ve opted to do it in this tutorial as it does make the import path more distinct.
{
  "name": "@react-monorepo-example/shared",
  "version": "0.0.1",
  ...,
}
Linking the packages
Let’s now set up the shared package to be consumed by the app, and the web package. To do this we need to do two things, add it as a dependency within our ‘package.json’, and to ‘yarn link’ the directories.
So in our example we would add ‘@react-monorepo-example/shared’ to dependencies for both the app, and web. When adding the dependency make sure the version number of the “shared” directory is the same as the version value within the shared folders ‘package.json’.
Web
  {
    ...,
    "react-scripts": "4.0.3",
    "typescript": "^4.1.2",
    "web-vitals": "^1.0.1",
    "@react-monorepo-example/shared": "0.0.1"
  },
App
"dependencies": {
    "react": "17.0.2",
    "react-native": "0.66.3",
    "@react-monorepo-example/shared": "0.0.1"
  },
Let’s now ‘yarn link’ the directories. Change into the shared directory and run
yarn link
Now let’s change into our other packages (web, app), and run
yarn link "@react-monorepo-example/shared"
Now we’ve successfully set up each package, added them as a dependency, and linked them.
To be cautious since we’ve adjusted our ‘nohoist’ settings, and haven’t yarn installed our shared package yet, we should delete the root ‘node_modules’, and ‘yarn.lock’ as it can cache changes (leading to some hair pulling configuration issues).
From the root directory,
rm -rf node_modules yarn.lock packages/*/node_modules
Fresh install, who dis
Now we need to install our new dependencies. One nifty feature from yarn workspaces is that when you run yarn install in the root, or any project directory, it will install all required dependencies for all packages. So app, web, and shared will all update.
To take advantage of that, and kill two birds with one stone, let’s change directory to the app package, and yarn from there. That way we can yarn install, and do a pod install
yarn && cd ios && pod install && cd ../
Cleaning up the shared directory
Now we’re onto the last-leg of this tutorial. Let’s first do some clean-up and remove unneeded dependencies from the shared package we only need React, and Typescript.
The shared directory’s ‘package.json’ should look like this
{
  "name": "@react-monorepo-example/shared",
  "version": "0.0.1",
  "private": true,
  "workspaces": {
    "nohoist": []
  },
  "dependencies": {
    "react": "^17.0.2",
    "typescript": "^4.1.2"
  }
}
Lets also remove all the files within the ‘public’ and ‘src’ directories - since it’s just a shared code space we don’t need an actual running React application.
While we’re within the shared folder let’s set up a value to be shared across the app, and web. Create a new file called ‘test.ts’, and let’s put an exported ‘testNumber’ with a set value there.
export const testNumber = 50;
Our next step is to setup the app, and see our shared value come through.
React-native setup
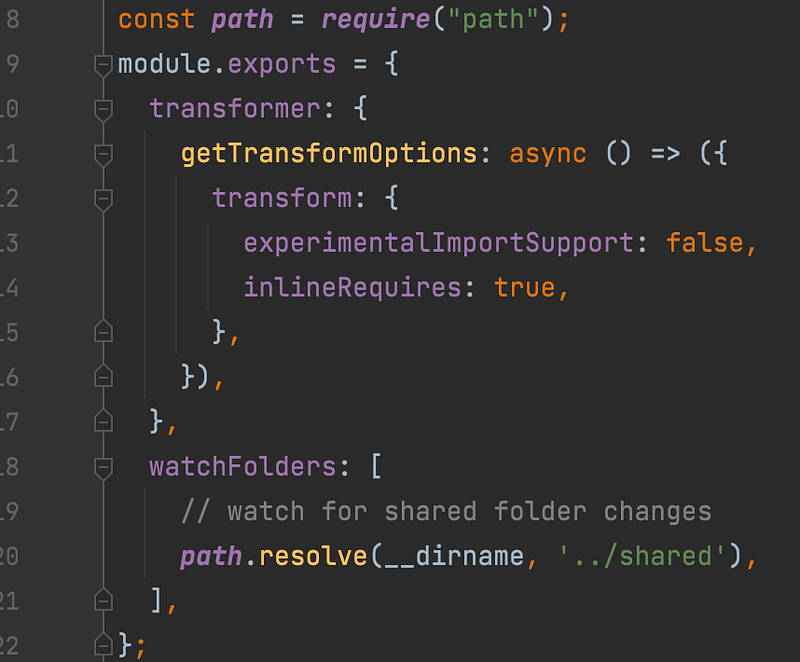
Before we start our metro server, we need to update it to watch the ‘shared’ folder for any changes. So let’s open up the ‘metro.config.js’, and insert
watchFolders: [
    // watch for shared folder changes
    path.resolve(__dirname, '../shared'),
],
Now we can start our metro server
yarn start
Next we need to start the app. Lets do that by either running
// from the CLI
yarn ios
// or
yarn android
Alternatively by opening Xcode/Android Studio. Personally, I generally always start React Native apps via opening the ‘.xcworkspace’ file within the ‘app/ios/app/’ path inside of Xcode.
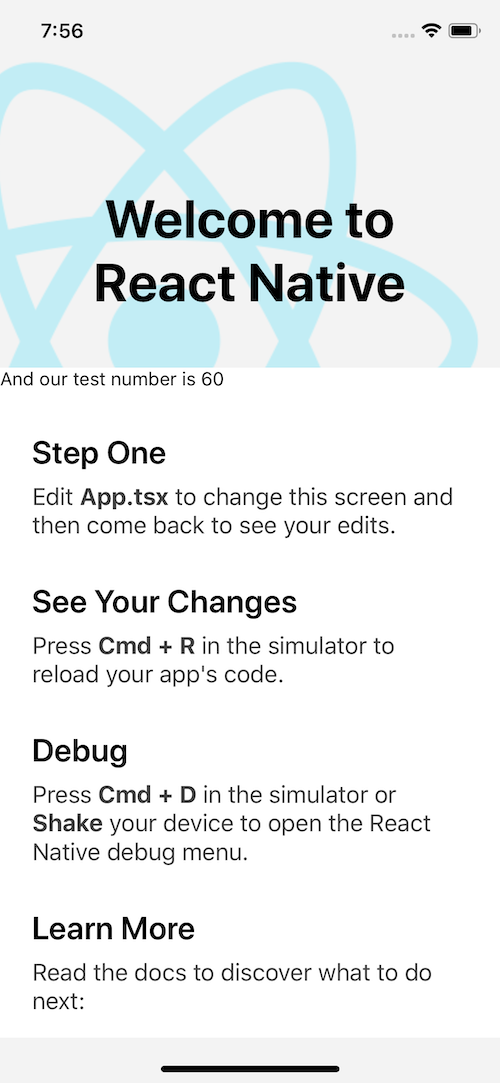
Next let’s add some text within the ‘App.tsx’ which will reference the shared value we made earlier
<Text>And our test number is {testNumber}</Text>
Make sure the import to ‘testNumber’ is absolute, and not relative, it should look like this
import {testNumber} from "@react-monorepo-example/shared/test"
If the above instructions have worked, you should see this on your machine

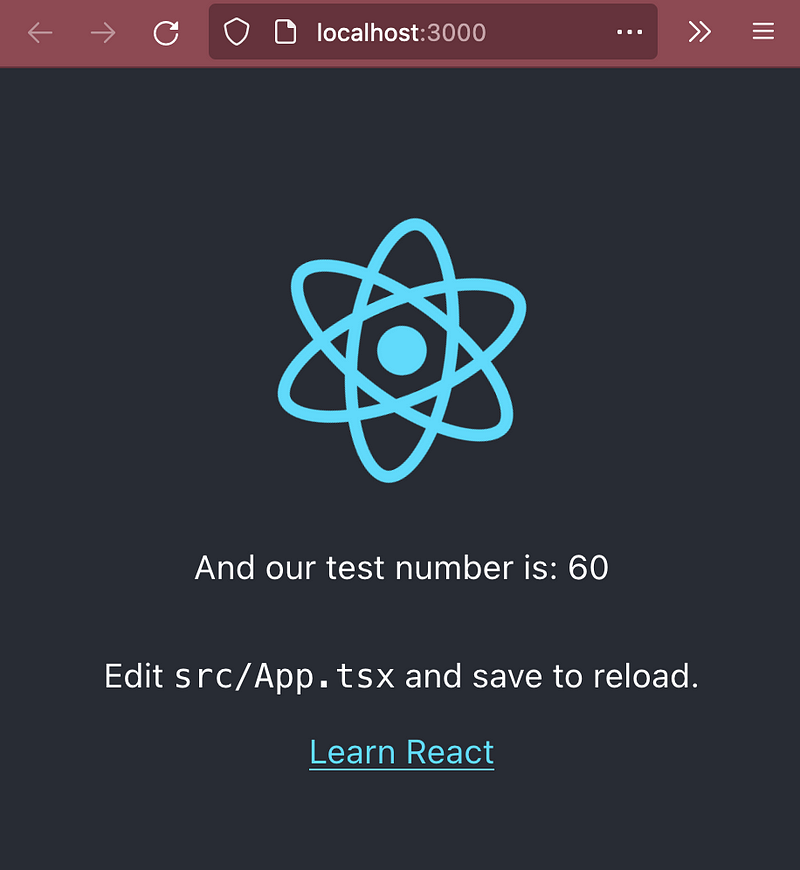
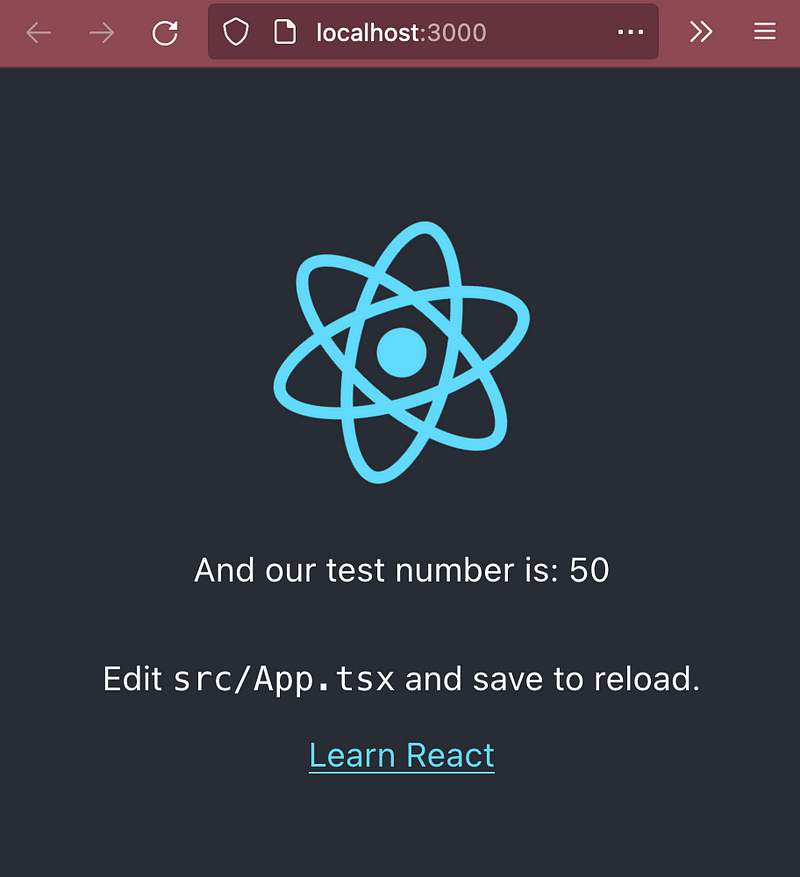
Now let’s also make sure that updates to the shared folder also update for our metro server, so let’s change the ‘testNumber’ from 50, to 60. If it worked, it should look like this.
If we didn’t update our ‘metro.config.js’ to watch the shared folder you would need to manually restart the metro server every time you changed something in the shared directory.
Web setup
Lucky for us, the web package should work straight out of the box. Let’s just update the ‘App.tsx’ to use that shared value as well.
Let’s insert
<p>And our test number is: {testNumber}</p>And make sure the import path is absolute, it should be the same as the import we used for the app!
Then to launch the web app, within it’s directory just run
yarn start
Even hot reload works straight out of the box! Update the testNumber back down to 50!
Recap
If you’ve followed along, congratulations! You’ve setup your first React monorepo! 👏
You’ve achieved the following
- Setup React web app
- Setup React native app
- Created monorepo structure
- Linked ‘shared’ repository to both apps
- Saw a shared value appear across both platforms
The skies the limit!
The ‘testNumber’ is just a placeholder for every other thing you can imagine sharing between the two code bases. Perhaps you want to share hooks, images, brand colours, you name it.
If you didn’t follow along, you can check out the finished product here.


